10 Printable Arcade Button Template Template Monster
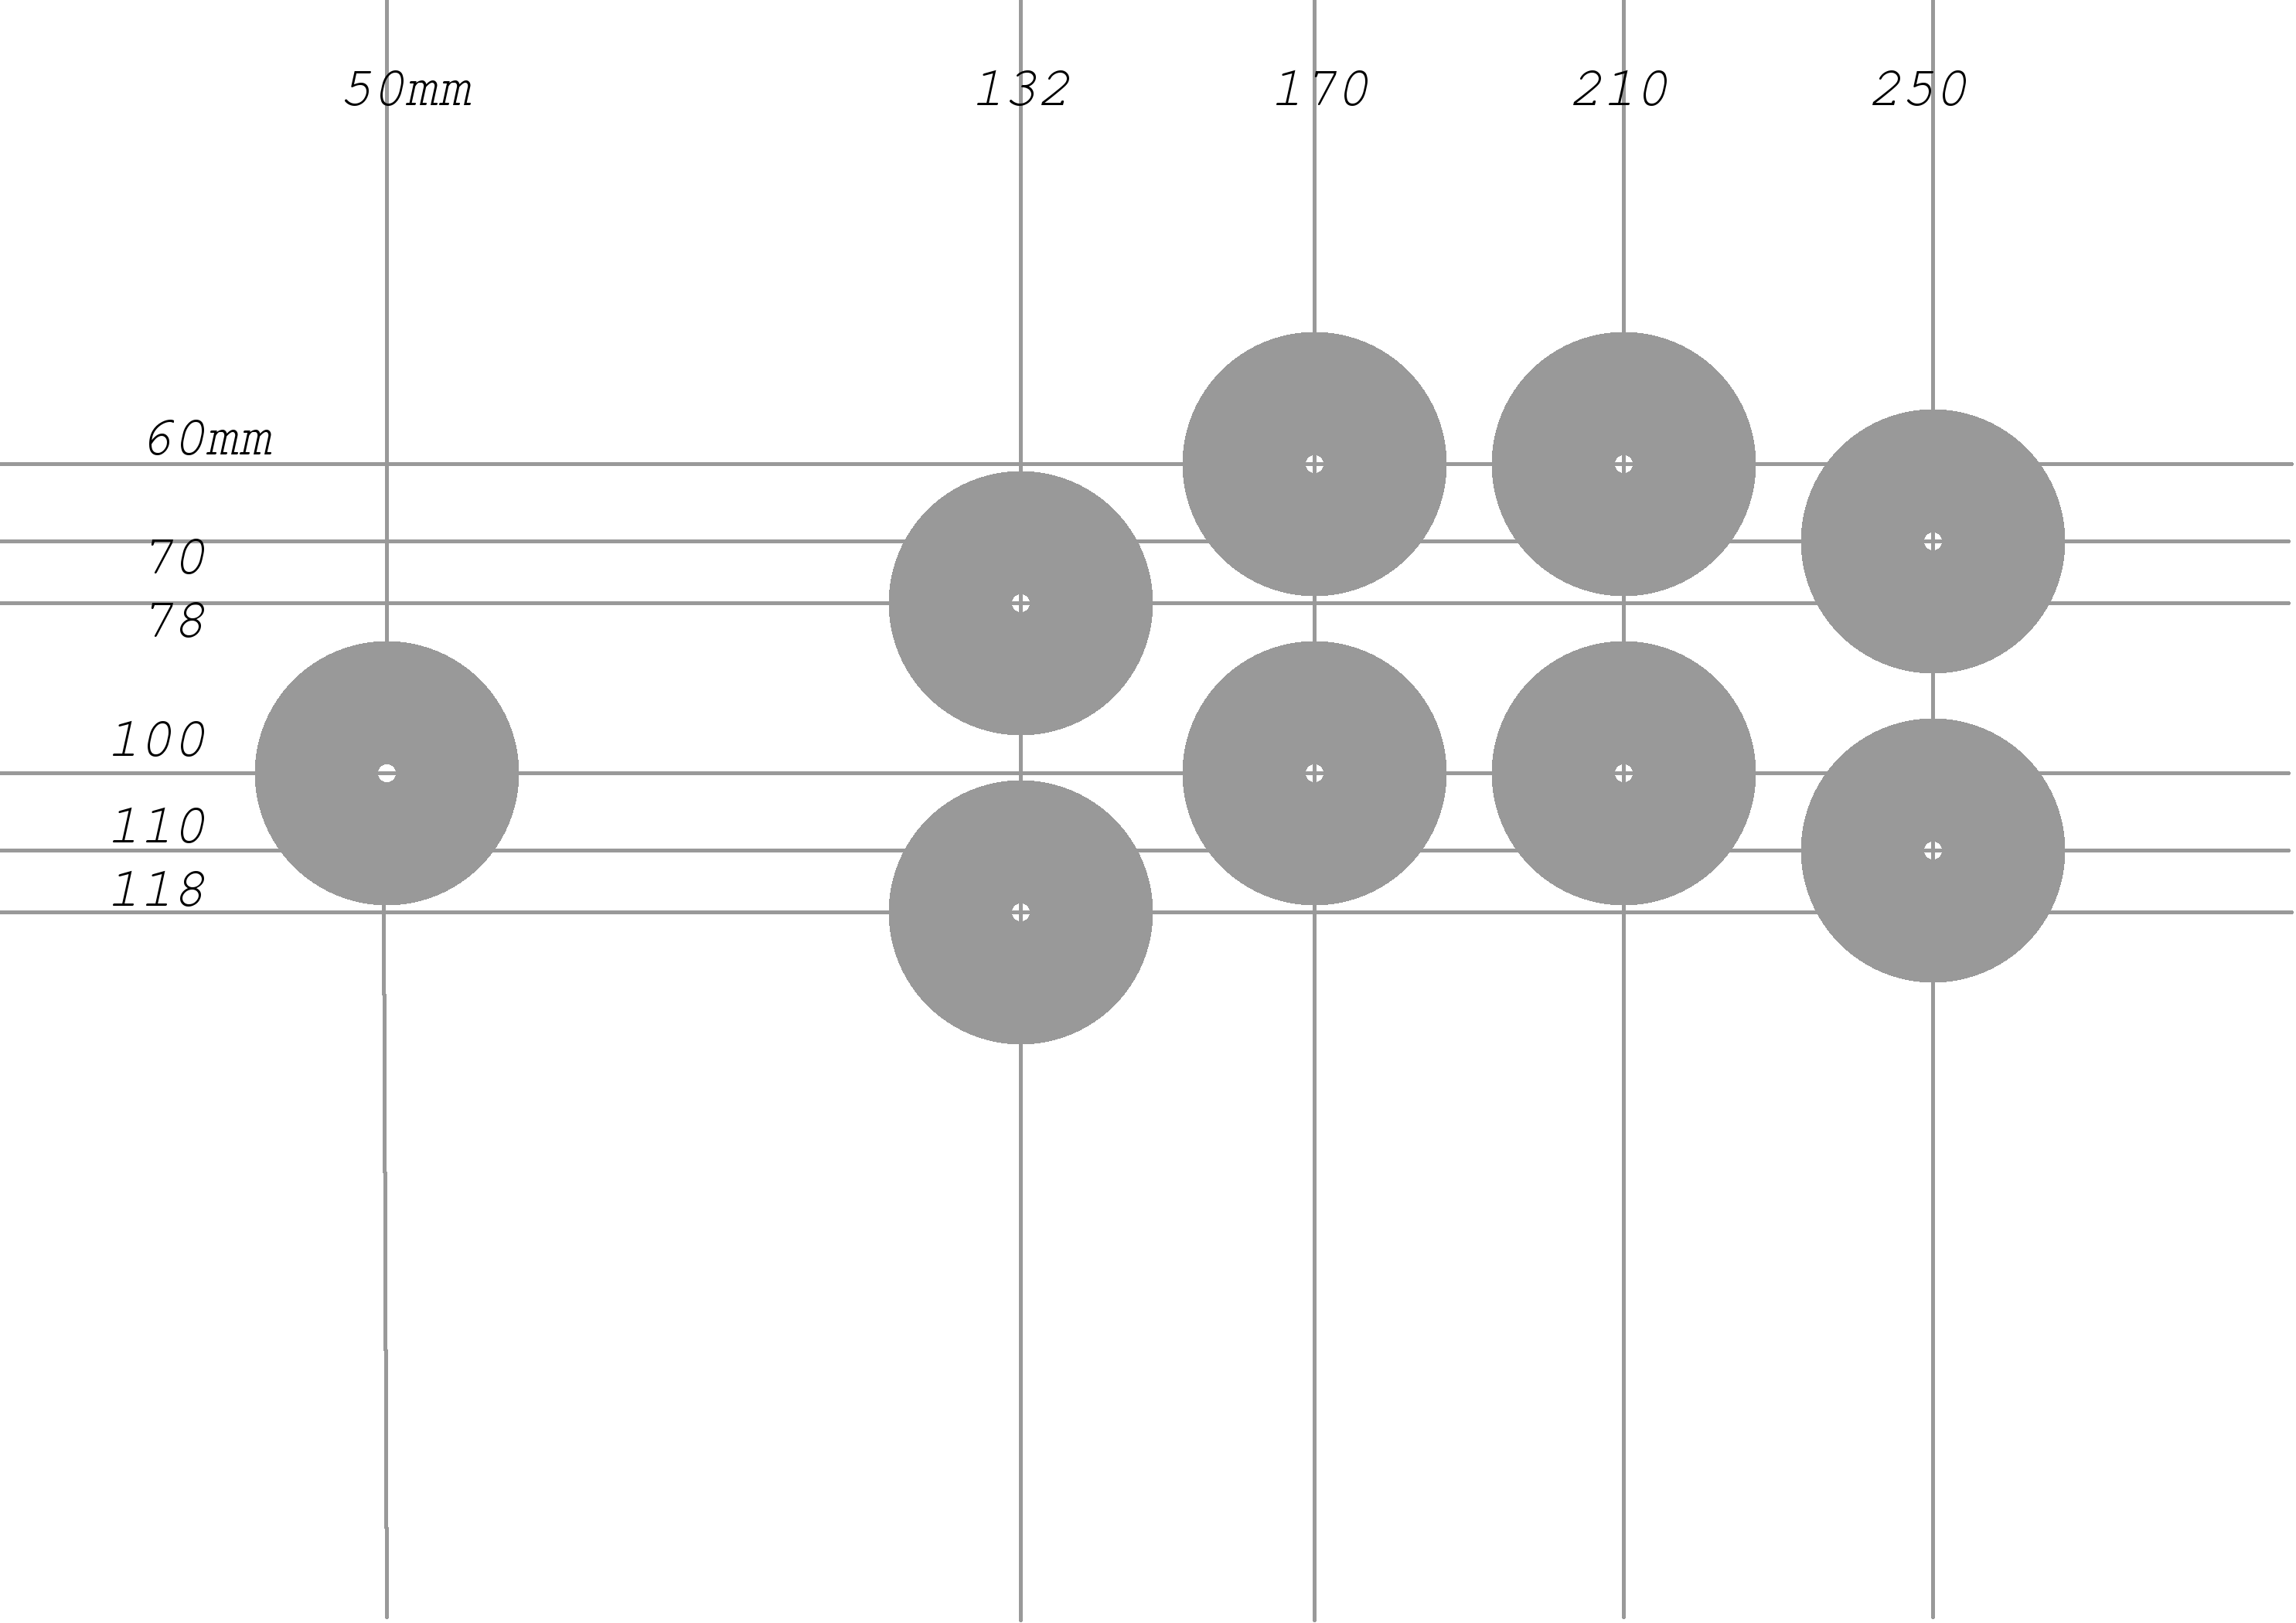
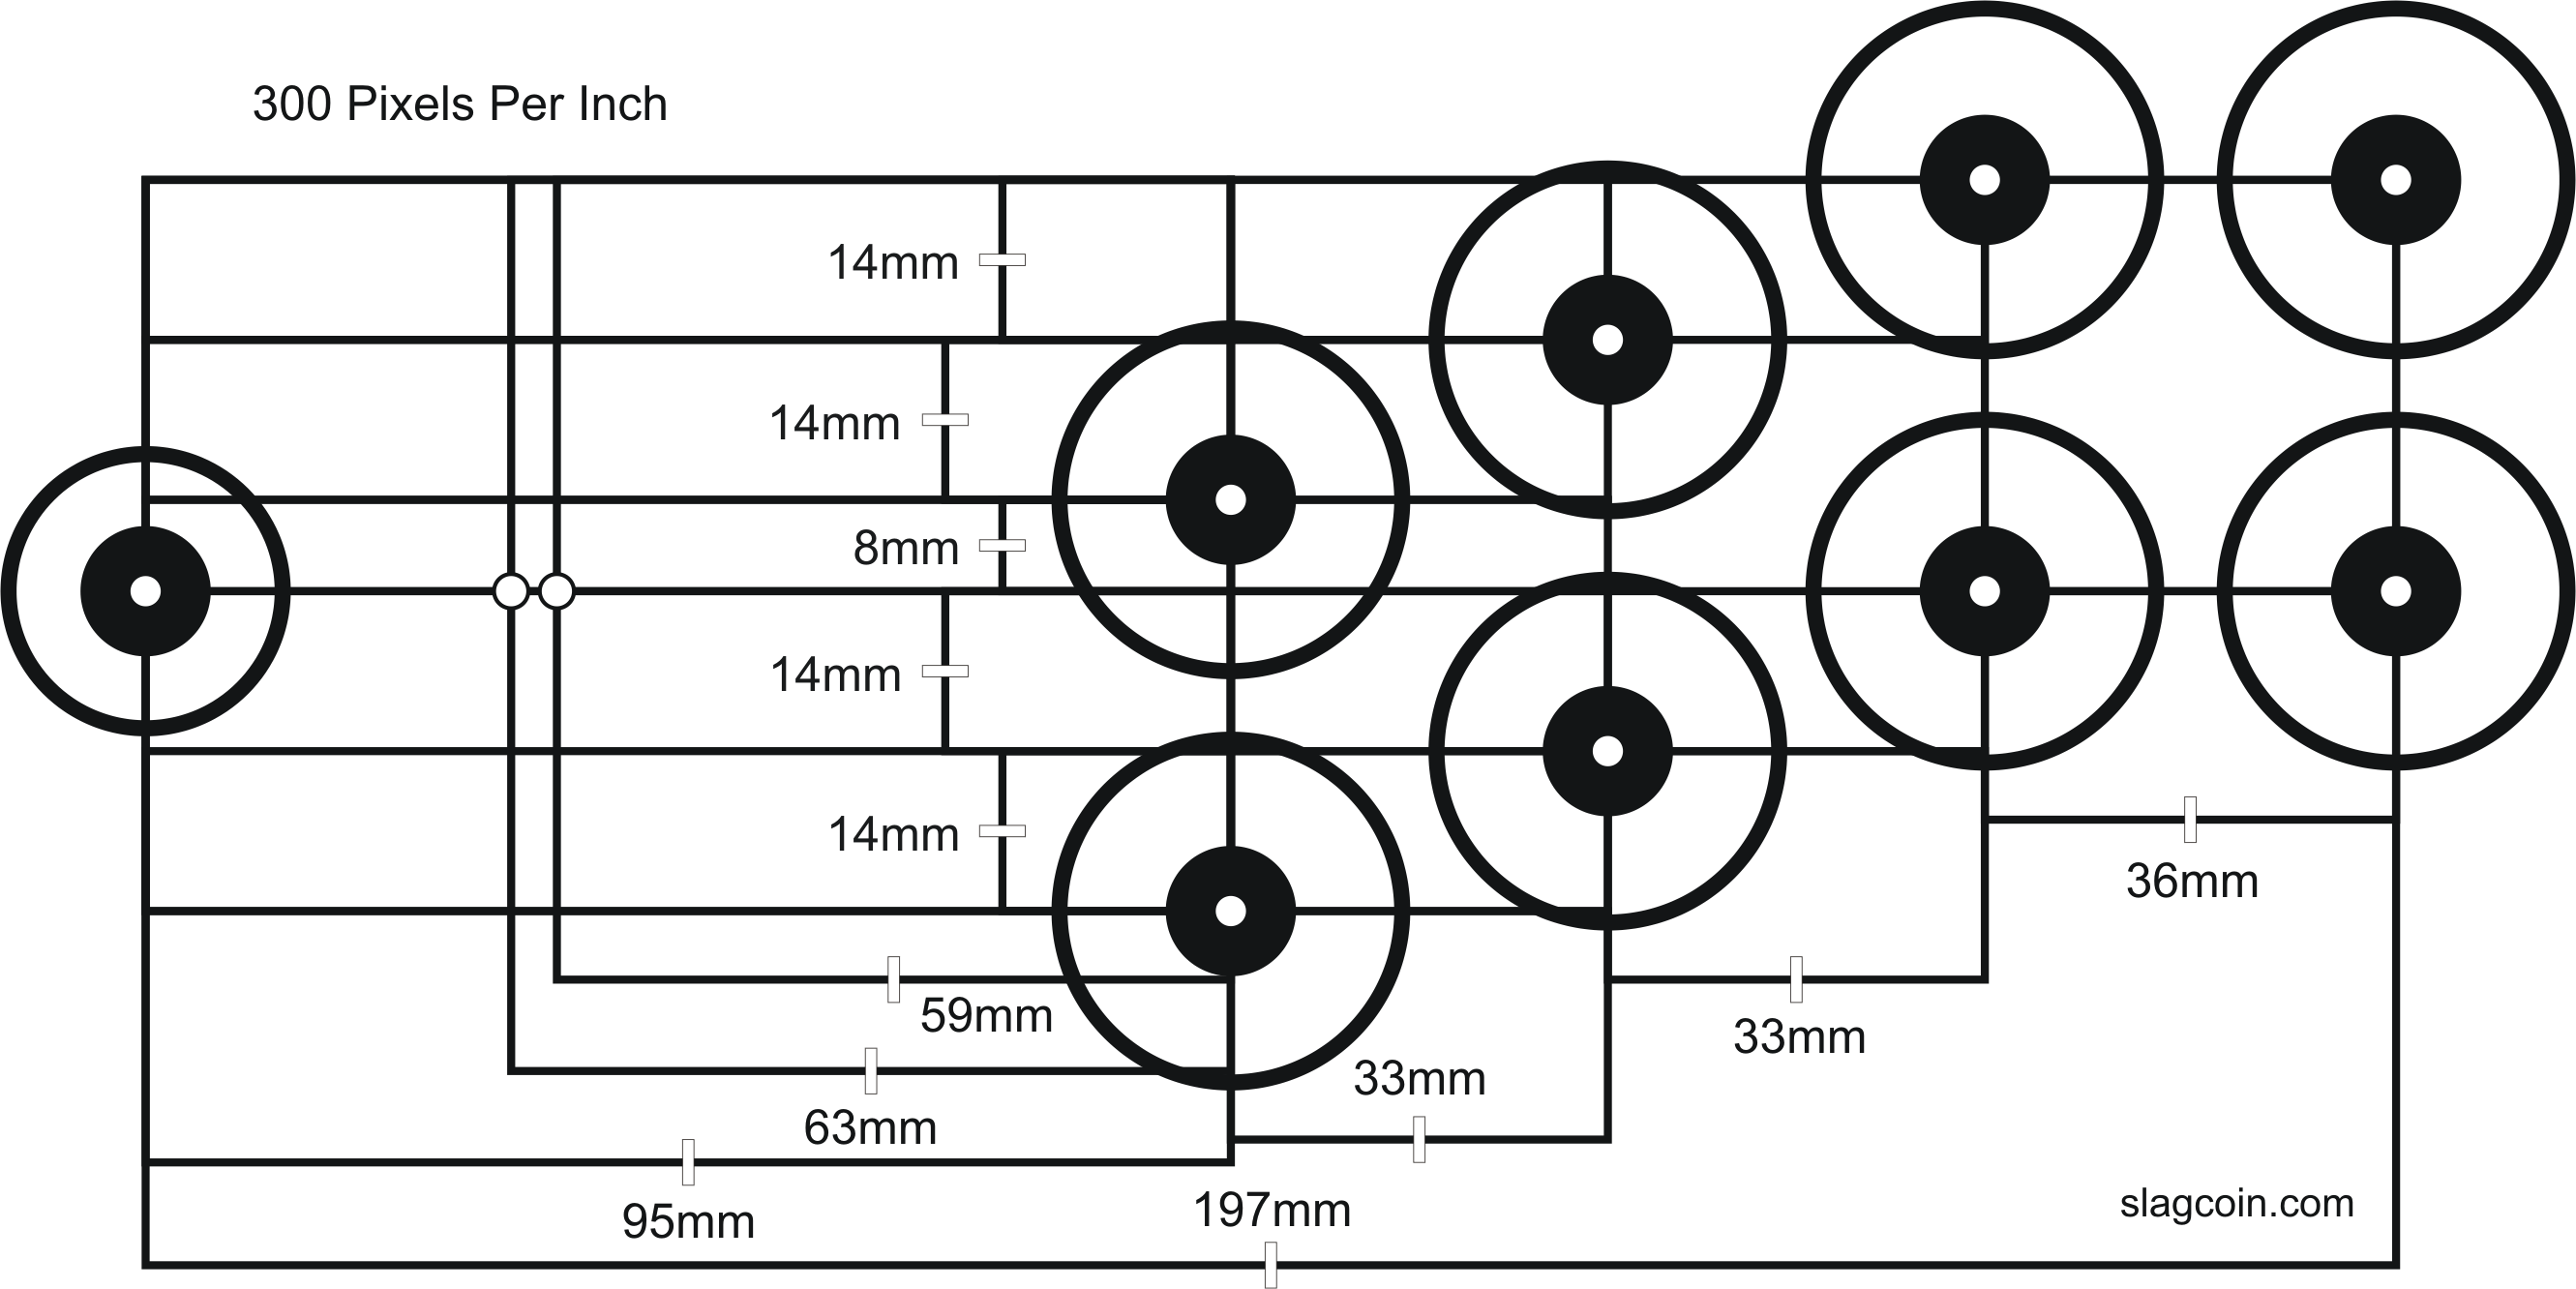
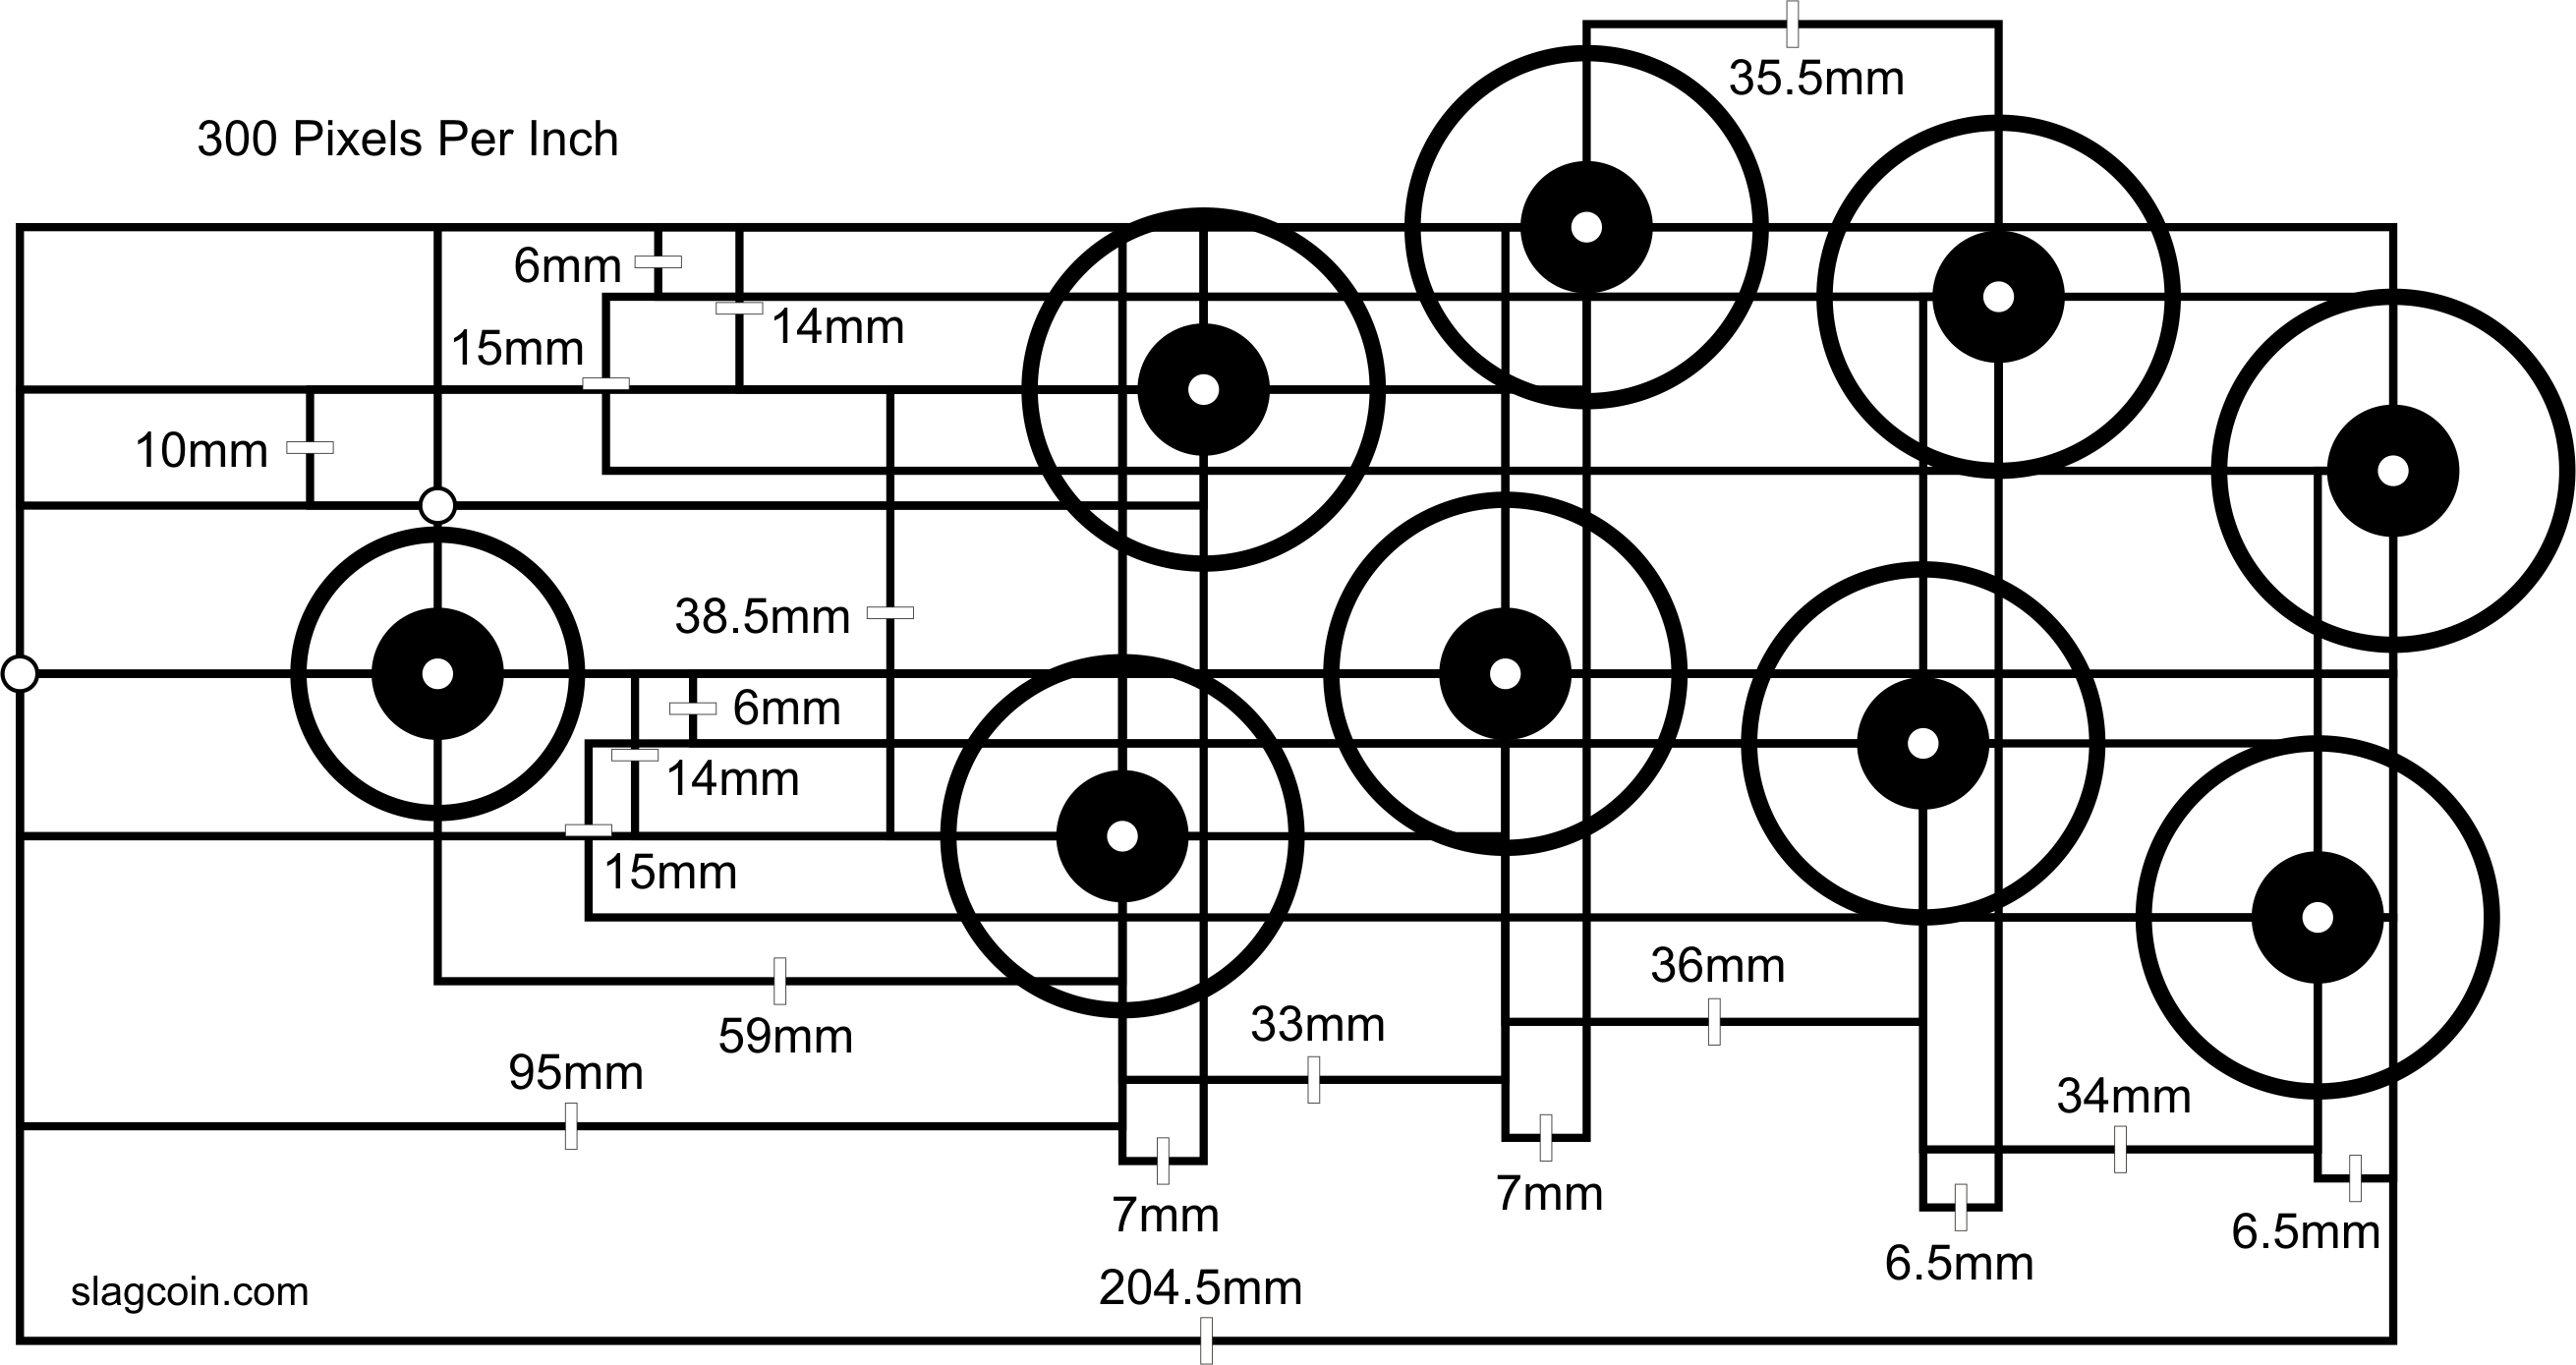
About 36mm-36.5mm is a common standard spacing between 30mm button centers. With 24mm buttons, the minimum distance is more like 29mm. If a player would be more comfortable with less spacing, smaller buttons should be considered.

Arcade buttons, Arcade, Arcade
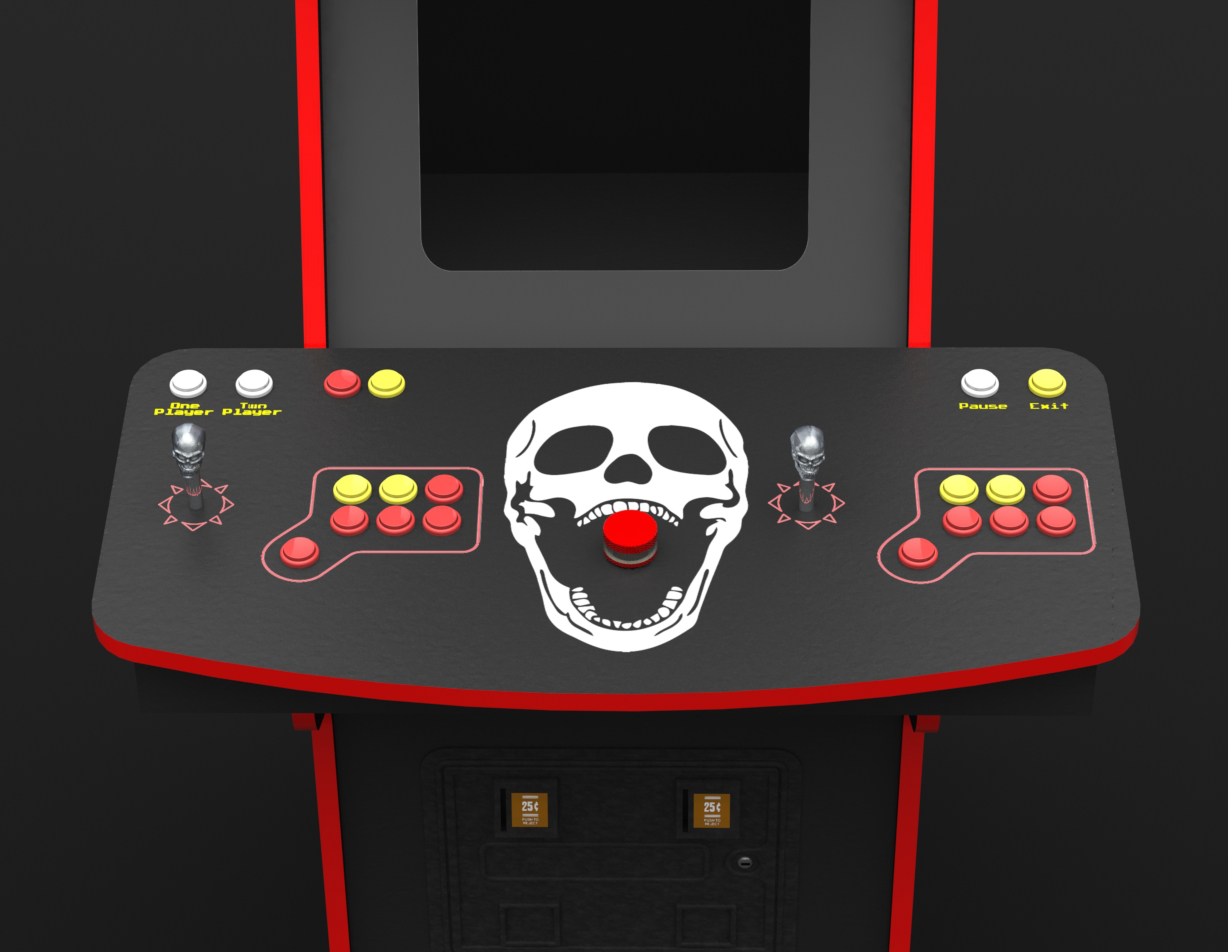
Posted May 28, 2016. On 3/16/2016 at 7:06 AM, helmgar said: I believe the seven button layout is to mimic the six button layout of Street Fighter cabinets in a 3X2 grid and the four button layout of Neo Geo cabinets in a 4x1 layout with a slight curve.
PIC18F4550 based arcade game controller for Raspberry PI running C64
layout guidelines only, not to be cut in any way joystick drawn this size for reference only, drill a hole big enough to enable free movement in all 8 directions when the stick is mounted. approx 12mm should do it but make sure to test fit first! drill at centre mark, most arcade buttons will fit snugly into a 28mm mounting hole
Arcade button layout
78.1 %free Downloads. 1930 "arcade button layout" 3D Models. Every Day new 3D Models from all over the World. Click to find the best Results for arcade button layout Models for your 3D Printer.

Arcade button layout
1- Scope Our standup arcade cabinet's panel was originally designed the same way, but for only two players - each with a joystick and 6 buttons. One of the rationales for rebuilding the control panel is to add more possibilities to the arcade cabinet.

Control Panel Layout and Configuration Arcade control panel, Arcade
January 31, 2022 No Comments We've tried many ways of creating arcade button labels over the years. Originally we used a Cricut hobby vinyl cutter and made our labels, then someone mentioned we could try a P-Touch printer and that worked OK.

Arcade Button Layout Arcade TeePublic
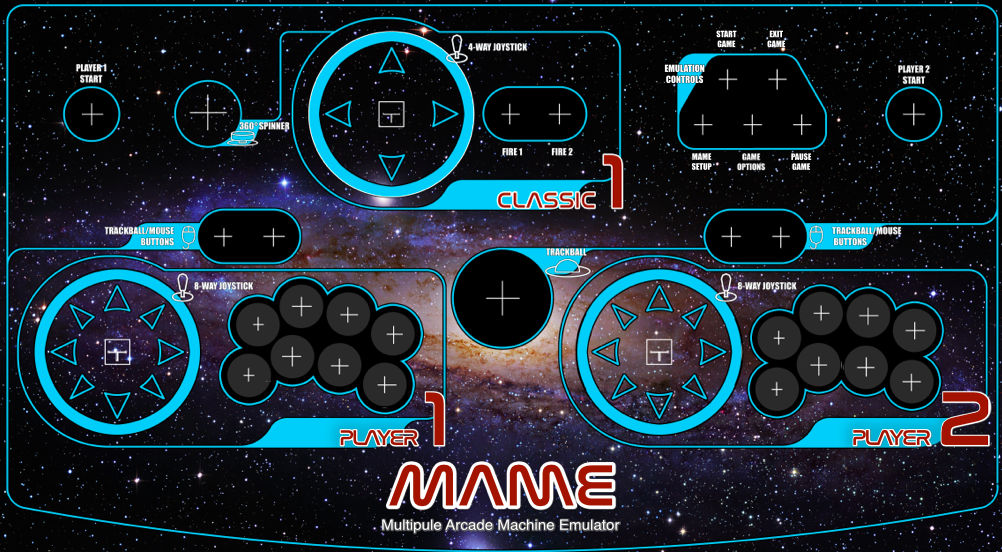
The dimensions of the full Marquee are 27" X 7 3/4". I belive this to be a fairly standard size. The Marquee is split up into three parts. Each section can fit easily on an 8 1/2" x 11" sheet of paper. You can see where the seam is if you look one screenshot to the left or right of the MAME logo.

Arcade button layouts
I agree. Adding two more buttons is crucial for the retro pie setup so they can be the "coin" buttons. I myself strayed away from modding the cabinet for this exact reason. Only recently did I get the courage to drill holes in the lower panel and complete the mod. Case and point: add two buttons for coins for each player.

Pin on Arcade
Here, you will find a repository of Adobe Photoshop templates that are used to submit artwork or etch graphics to FA Plexworks. Each are saved as compressed .zip files. Choose from the type and model below. If you have any issues with unzipping or using the files, please contact our support team by submitting a request. Scroll to:

Retropie Arcade Button Layout
A0, A1, A2, A3 from Adafruit Feather to Arcade button Ground from Adafruit Feather to Arcade buttons The buttons and LEDs will share a common ground. To make wiring easier, we'll connect the grounds in series. Number Of Buttons You can wire up to six different buttons to the Adafruit Feather using data pins 12-9. The LEDs can be wired to analog.
How to Build an Arcade Stick Easy, High Quality and Affordable TernBlog
I personally think 6 buttons: B, A, Y, X, L and R and then 3 more buttons: a Select button (for added coins) and a Start button (for picking/starting game) as well as a Special button (that's kinda like the Guide button on the Xbox/PS3 controllers that can be used as the Hotkey or other functions).
Pin de Jim Johnson em arcade Arcade, Controle arcade, Fliperama arcade
Here is the standard Capcom 6 button in 1:1 PDF. Capcom_6B_Template.pdf (93.41 kB - downloaded 5008 times.) Logged TOK Trade Count: ( +4) Full Member Offline Posts: 3604
8 Button Neo Geo Control Panel Overlay
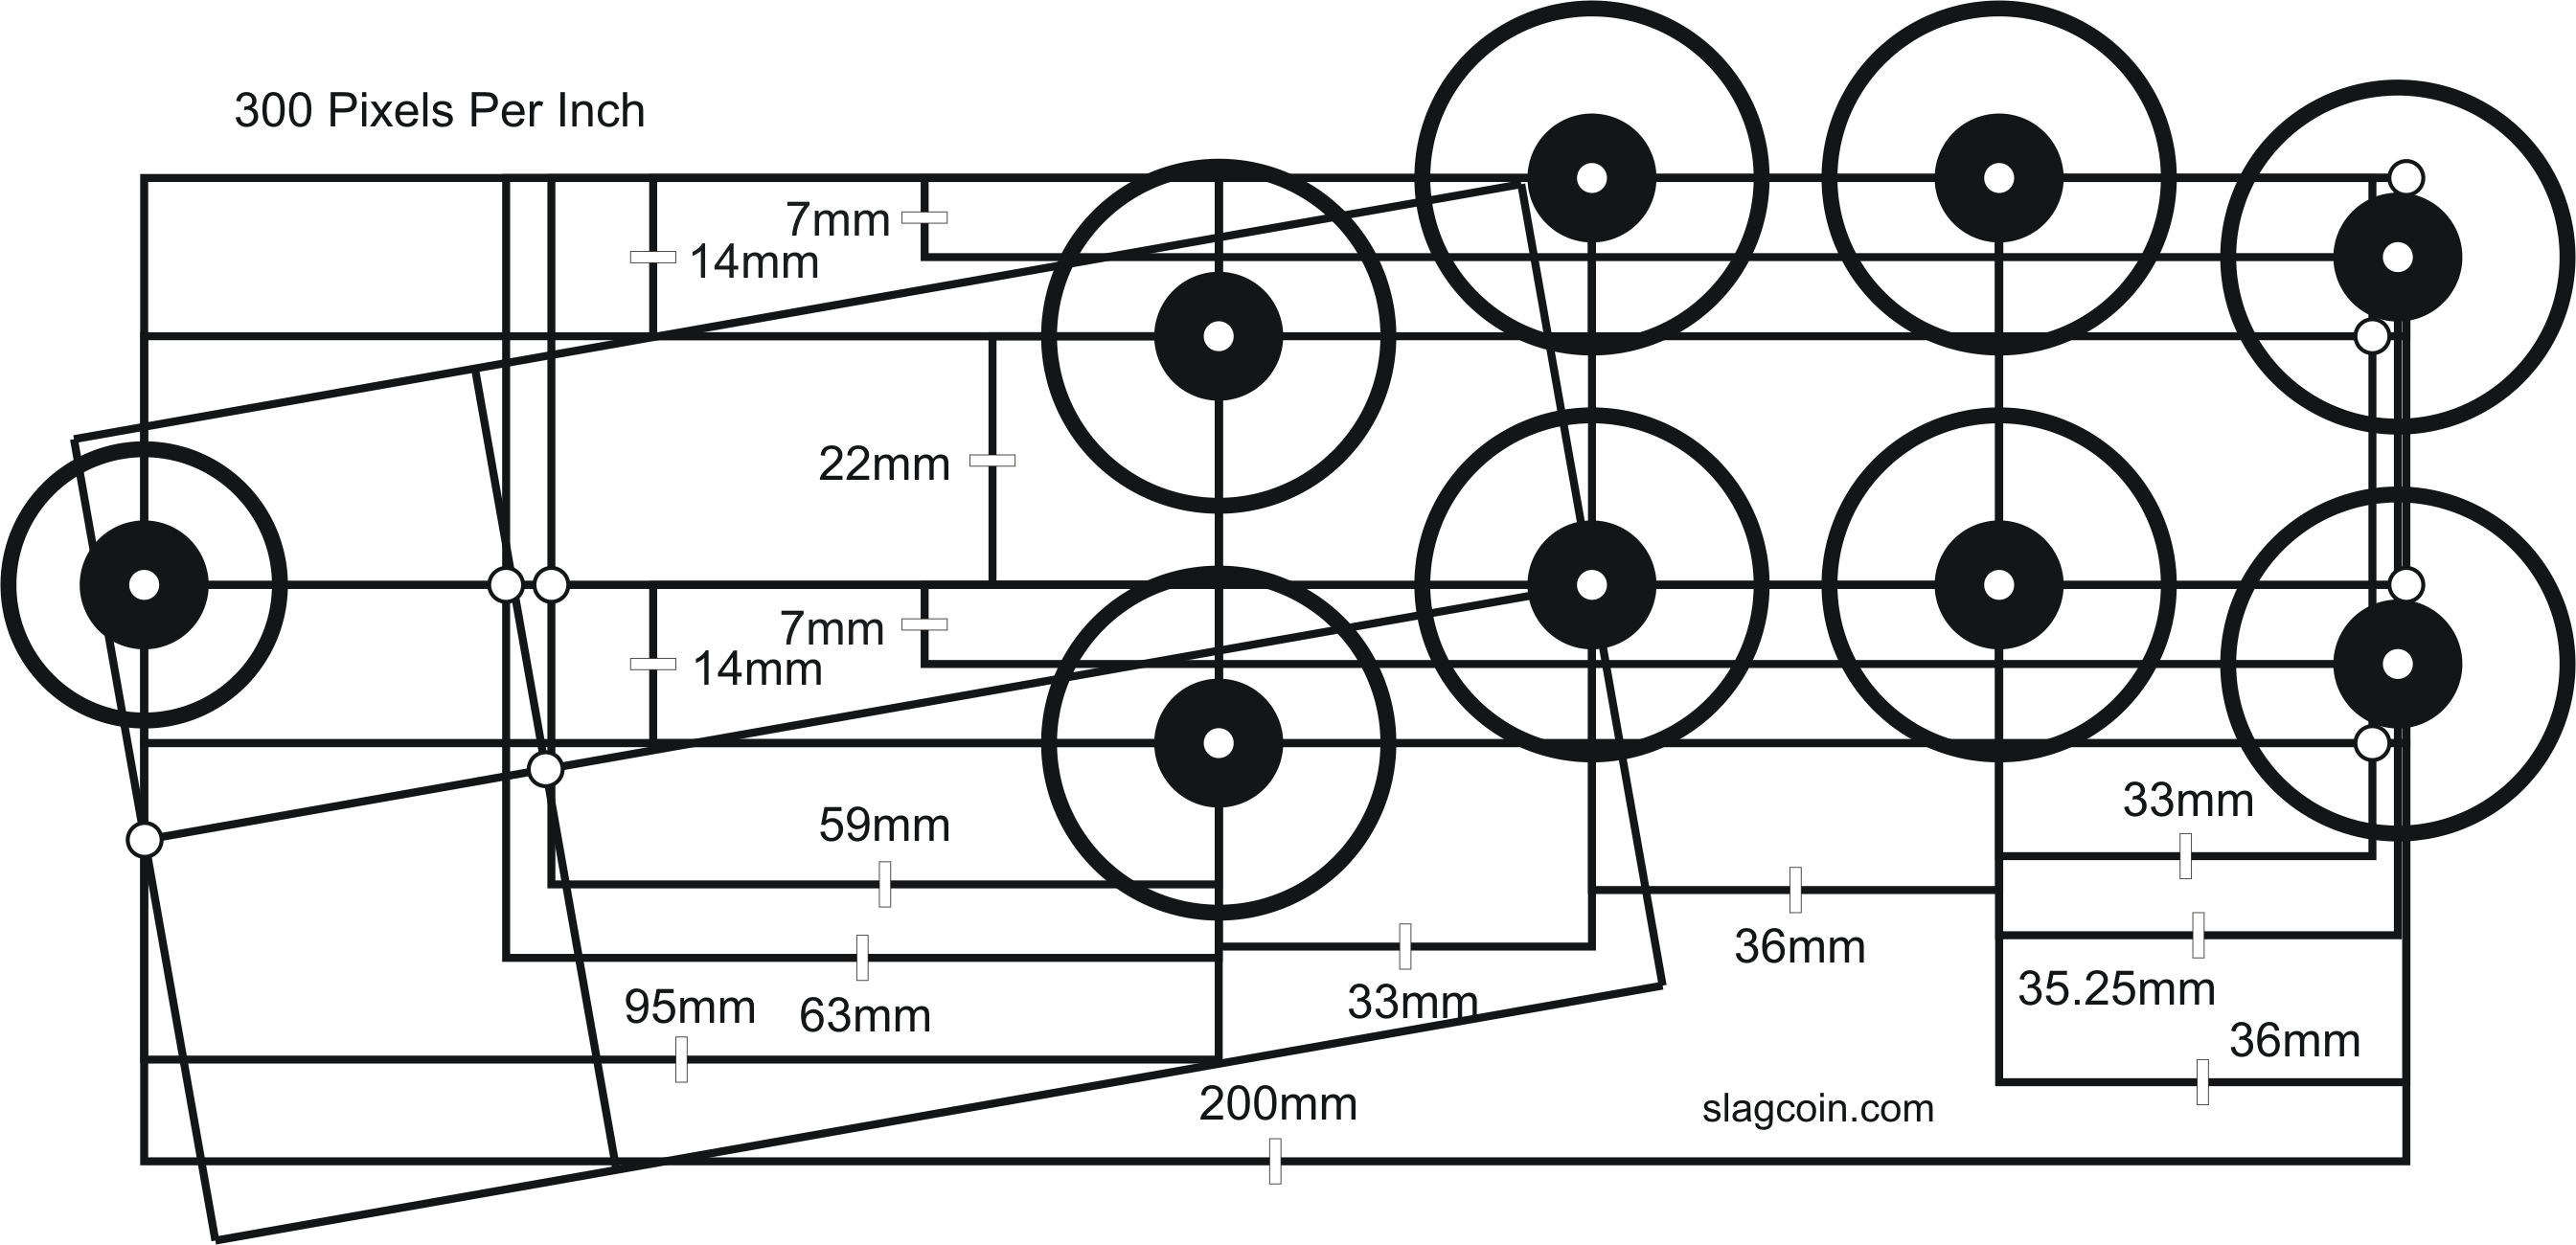
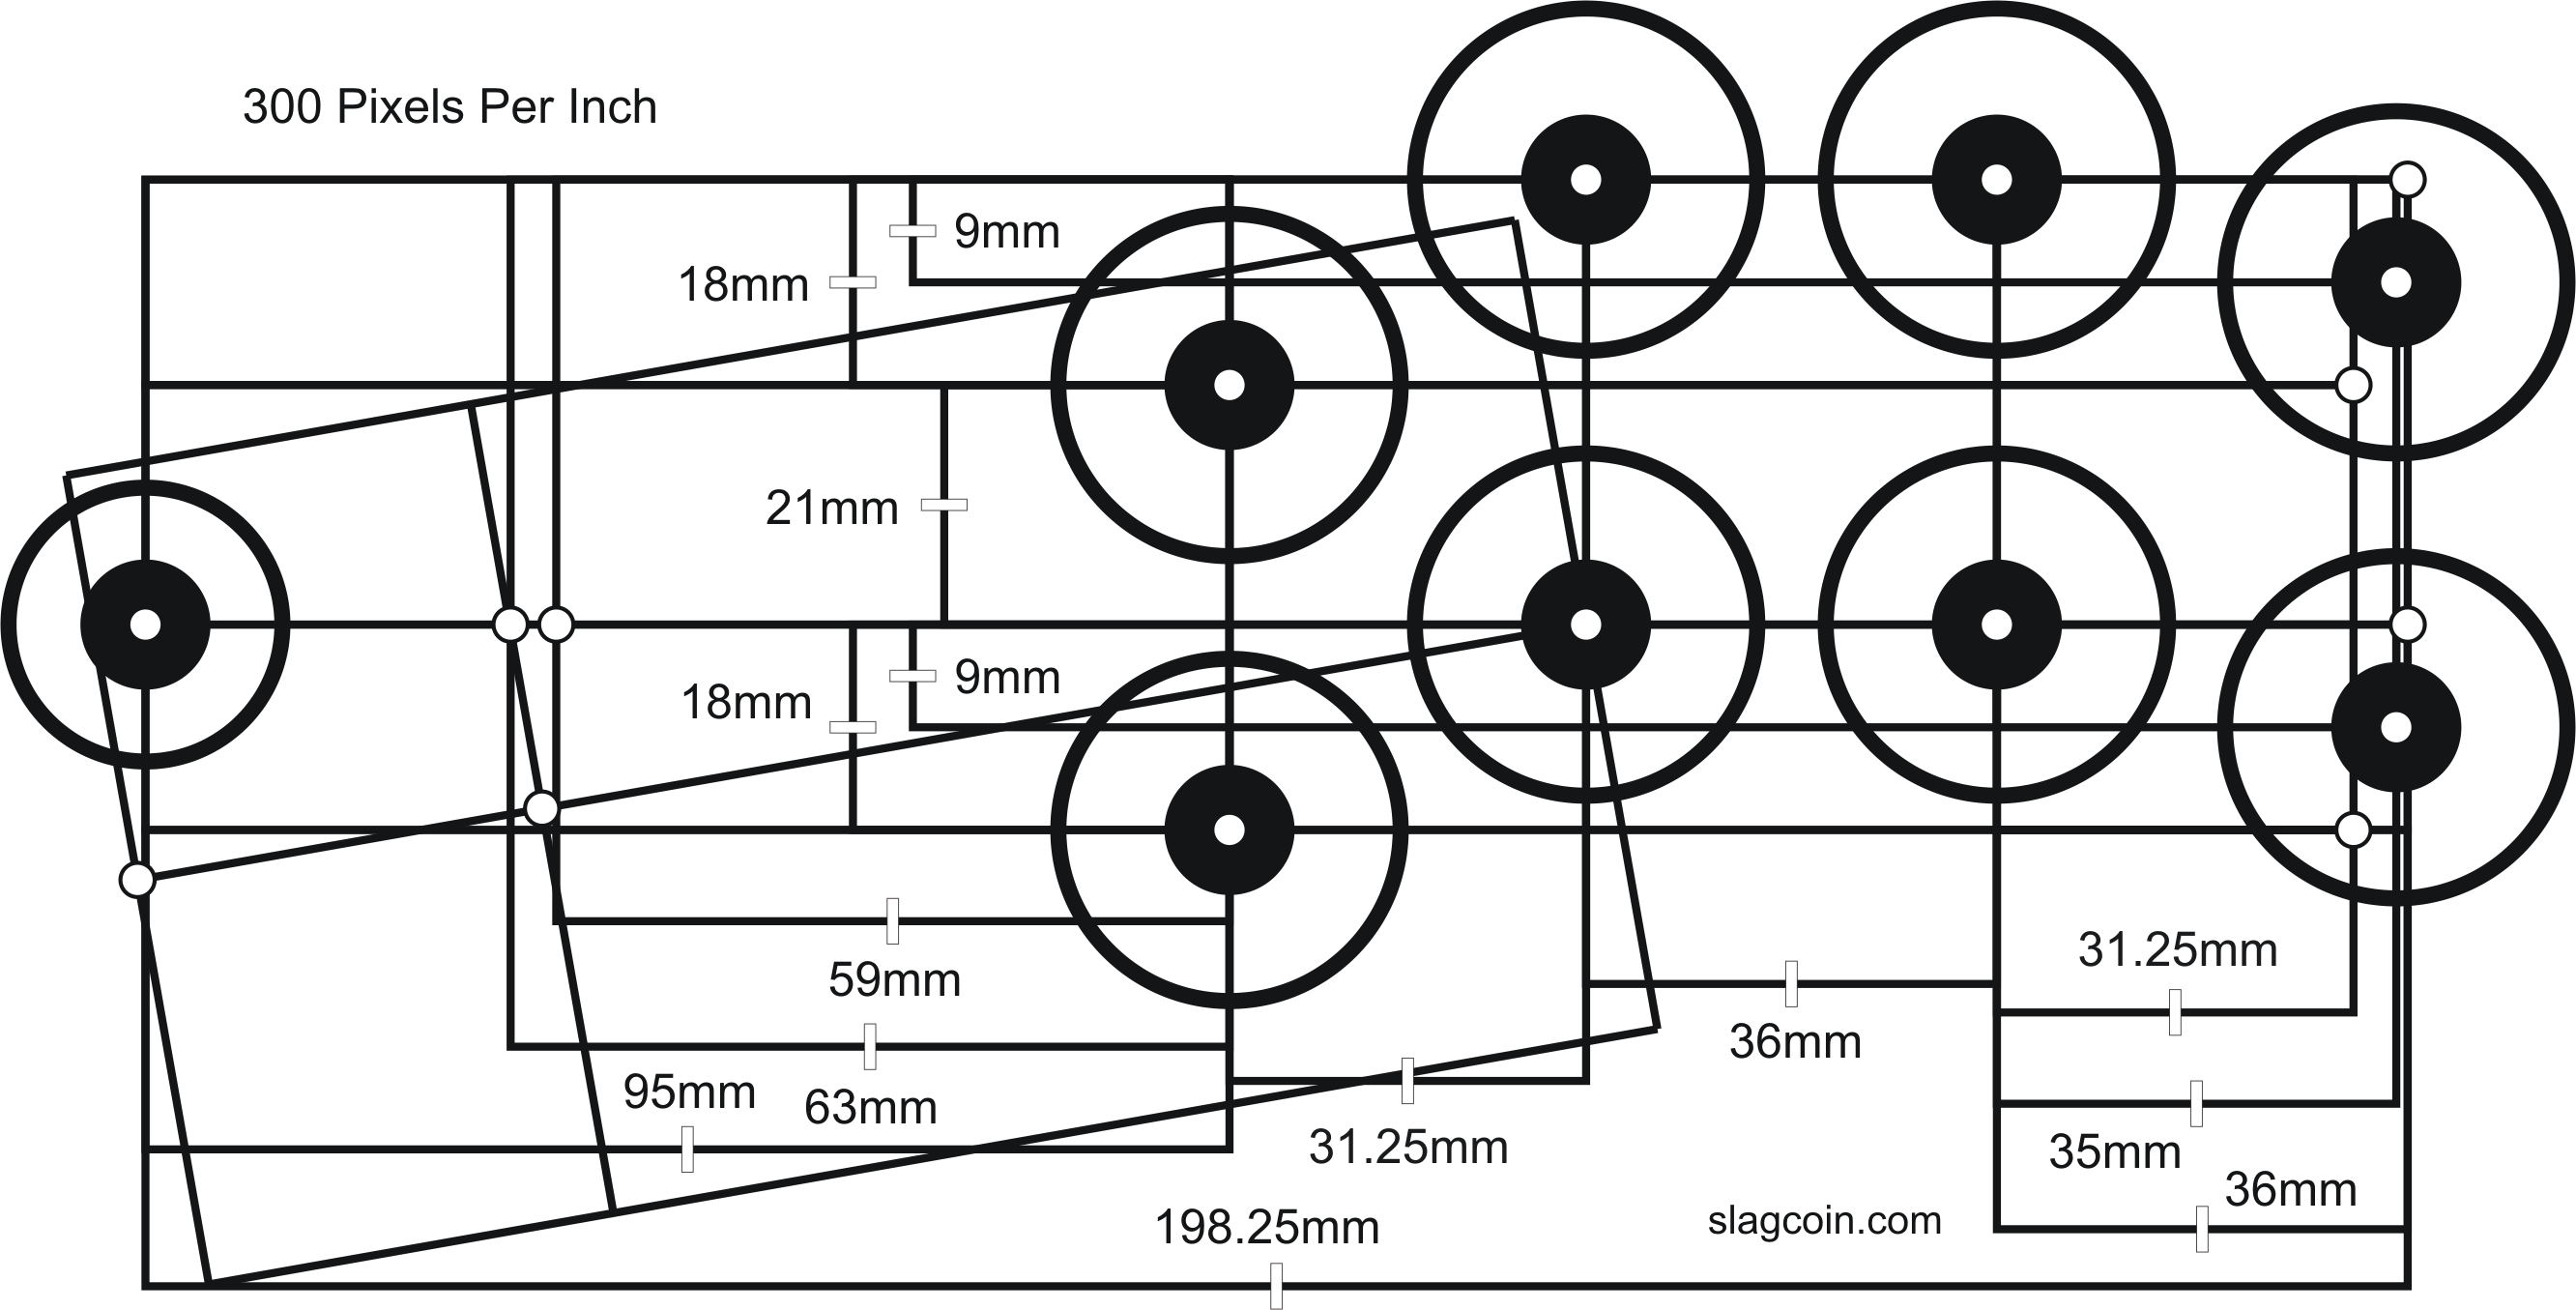
For button layout I used a template from Slagcoin and modded it, more on that (and my pdf template) in Step 3. The bartop arcade build took me just over a week from start to finish, working pretty much 10 hour days on it altogether and probably cost around $300-$400 (CAD) in total. I'll itemise the parts used and add it up later in this writeup.
Arcade button layouts
The first step in our Arcade Controls wiring, is understanding the buttons. The buttons have four pins on the bottom that are separated into two pairs: The microswitch and the LED. Wiring the Arcade Button Microswitch The microswitch are the two pins that inset in a gray or black plastic housing.

Downloads BambooArcade
456. 7. With modern fighters often using 8 buttons, the layout if and only if you intend to install modern fighters is usually: 4568. 1237. or: 1237. 4568. All of this is moot though, because regardless of the layout you use, be prepared to use ctrlr files in mame to reconfigure for games and here's why:
Arcade button layouts
1 boxdgm • 3 yr. ago I just used the avery design and print site, if you set it to template 4222 they will be the correct size circles for standard arcade buttons. Just line up the icons you want inside the circles and size them how you want. Not as easy as a premade file but didnt take long at all. reddit-toq OP • 3 yr. ago I need the icons.
